Time to read: 4 minutes. —
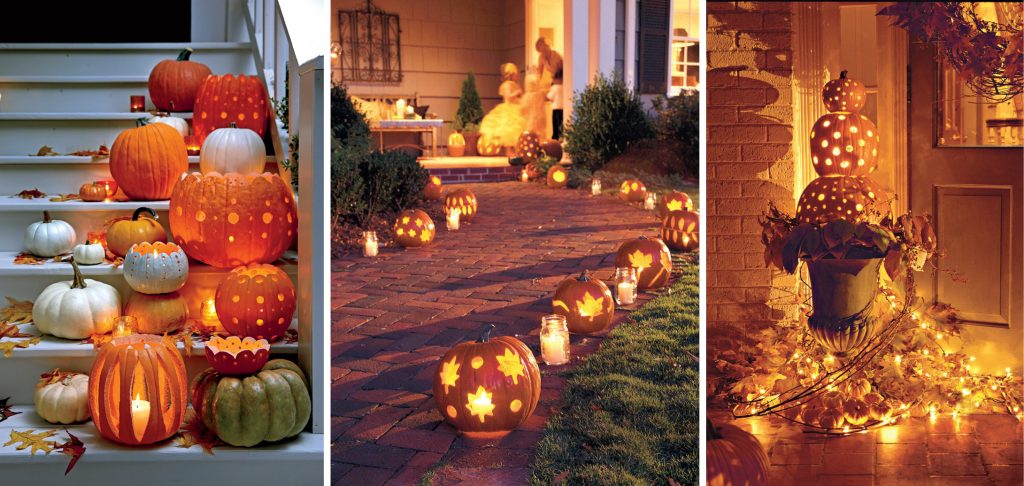
Here are 5 steps for carving your Halloween pumpkin. Want to make a difference? Add a bulb from SMART AND GREEN instead of a candle to bring a touch of originality!
Did you know? Halloween is 2000 years old!
Well, we are exaggerating a bit! The origins of Halloween date back to Samhain, a festival marking the end of the harvest season, taking place through the night of October 31st up to the morning of November 1st. Celtic people of Scotland and Ireland gathered around a feast and paid homage to their ancestors. Celebrating Halloween as we do it today began in the 19th century and, even though it evolved through the tears, it is still one of the most loved holidays in the US!
Did you know carving Jack-O’-Lanterns for Halloween was already a tradition all of the way back in the eighteen hundreds? Halloween was such a loved tradition that some newspapers decided to publish on their front page how-to articles about carving pumpkins, as early as in the 1860s!

Today, it is our turn to give you a tutorial that you can do by yourself, for couples, or even with your children. Stay until the end for a little modern and original twist.
Learn How To Carve a Jack-O’-Lantern for Halloween!
Don’t be afraid, your pumpkin will be spooky but this tutorial is far from scary! Before you start, you will need:
- A pumpkin
- A marker
- An x-acto knife
- A sharp and sturdy knife
- A sturdy serving spoon
Here’s 5 steps to follow for the perfect Halloween decoration
1. With the help of your marker, draw a circle around the stem of your pumpkin, on the top of its head. Using the knife, follow the circle to cut the crown off the pumpkin. Be sure to hold your knife diagonally and not straight towards the bottom, so the cap wont fall inside once the pumpkin is emptied. The skin and flesh of the pumpkin are really tough!
Therefore, cutting them is a tricky and delicate thing, which must be done with patience and precaution, by an adult.
2. Once the crown is off, it is time to empty your pumpkin! Using a big and sturdy serving spoon (as we mentioned above, pumpkins are really strong!), scoop out the flesh, fibers and seeds of your future Jack-O’-Lantern. Don’t throw anything away! Pumpkin flesh and seeds, baked in the oven, are wonderful fall meals. This step can be done with children but can be quite messy, so keep kitchen towels at hand! Know that the better the pumpkin has been emptied, the longer it will last.
3. Time to express your creativity! Once the pumpkin is empty, you can grab your marker and sketch a design. You can go for the famous mischievous smile and eyes, or let your imagination run free and try more modern designs. You can draw patterns like multiple cercles with different size, or even the outlines of fall leaves. Think about your decoration and what makes you happy!
4. Using the knife, follow your sketch and cut out the design of your pumpkin. Here, the x-acto knife is useful for precise detailing.
Have fun but be careful and patient, cutting through a pumpkin is not an easy thing, and must be done by an adult.
5. Now to bring your pumpkin to life! Here’s a little twist that you can add to your pumpkin for a touch of originality and modernity. Instead of a candle, it is possible to place a BULB (or BULBLITE for smaller pumpkins) inside of your Jack-O’-Lantern. Thus, you will be able to control the light that glows from your pumpkin with your smartphone, or tablet, through the Smart and Green app.
Try colors like red, green or even blue for a ghoulish and unexpected light! The Candle mode will imitate the light of a candle that flickers inside of your pumpkin and also comes in blue, giving the feeling of a haunted candle! The practical advantages that come with a BULB from Smart and Green, is the possibility to turn them on and off with your smartphone (no need to go outside and light up the candles by hand, if they can resist the wind, of course!) but also the possibility to schedule them to turn on by sunset, so that your house can light up on its own right by nightfall Have no fear, our bulbs are shock resistant, waterproof and have an autonomy of 8 hours.
Discover what you can do with a BULBLITE and a pumpkin! 🎃
Pumpkins are a KEY element for every Halloween decoration. By following these 5 steps, you will be able to let your imagination run free and carve your own little pumpkin!
